Wednesday 25 October 2023

12v Electrical Board 28/11/23

Final stages, covering the 12v electric circuit board! Just the 12v electricity sticker to fit when arrives. Used a couple of bed side rail brackets so it just drops onto the side panels. Was a bit of a nightmare lining up the 2 brackets as I needed to drop the panel down a couple of inches! Also probably paint the side panels as well later.
12v warning sticker in place 03/11/23

Saturday 15 July 2023

Finishing touches 14/7/23


Edging fitted to edges of toilet box. Just have to build a cover for the 12v / solar electrical panel. But a trip to B&Q needed as I've no MDF left . Idea is make a front cover with 2 sides, and using hook style catches fitted to back board it will just slot on.Top and bottom will remain open to allow airflow. Daffy Duck is van mascot teddy bear is our eldest grandson who wanted him to be in van . The blue "gremlin" in the middle is a Orchid Orchid Gnome made by by sister , mainly taking the P as she can't grow orchids. πŸ˜‚

Wednesday 5 July 2023

Nearly Finished!


Porta potty in place and secured with foot plate! 
So usable at last!
Cushion will have new cover colour similar to paintwork. 
Just the wiring board to box in now! 
And add some black trim to the loo box!

Monday 26 June 2023

hooking up Propex to 907 bottle and Portable hob/grill unit.

Let the faff on beginπŸ˜‚
907 LPG bottle installed into cabinet next to Propex heater. LPG pipe fitted with quick release unit. 
Turned on LPG plenty of air no LPG! Quick release checked ok, tried without the quick release and got LPG! Put it back nope! After a bit of fiddling it worked guess the quick release was just a bit sticky! 
Short run to Propex put propex on no fire up, fan only, was a hot day so maybe not cold enough for thermostat?? Let it run cold air whilst I fitted up the hose for the grill n hob unit. 
Turned off/ on still no ignition! Checked to make sure I'd fitted the quick release the right way around yep! Checked a free hose definitely getting LPG thru from cyclinder!
Did the propex restart shenanigans ( turn dial between off, on, heat and back 3 X, about a second or so between clicks.) Worked, all working! Let it run for a few minutes, turned it off waited again, then back on ! Successful!
Another job done.
Just need to add LPG pipe and quick release to the portable grill n hobs. 
And fit a couple of battons and a strap to secure the 907 bottle! 
And we're functioning!

Meanwhile I've got a motorcycle to get reacquainted with! πŸ˜‚

Boxing in rear units nearly finished

The new lightweight floor units, have been a pain to complete due to hassles with provider. Finally sorted and fitted. 
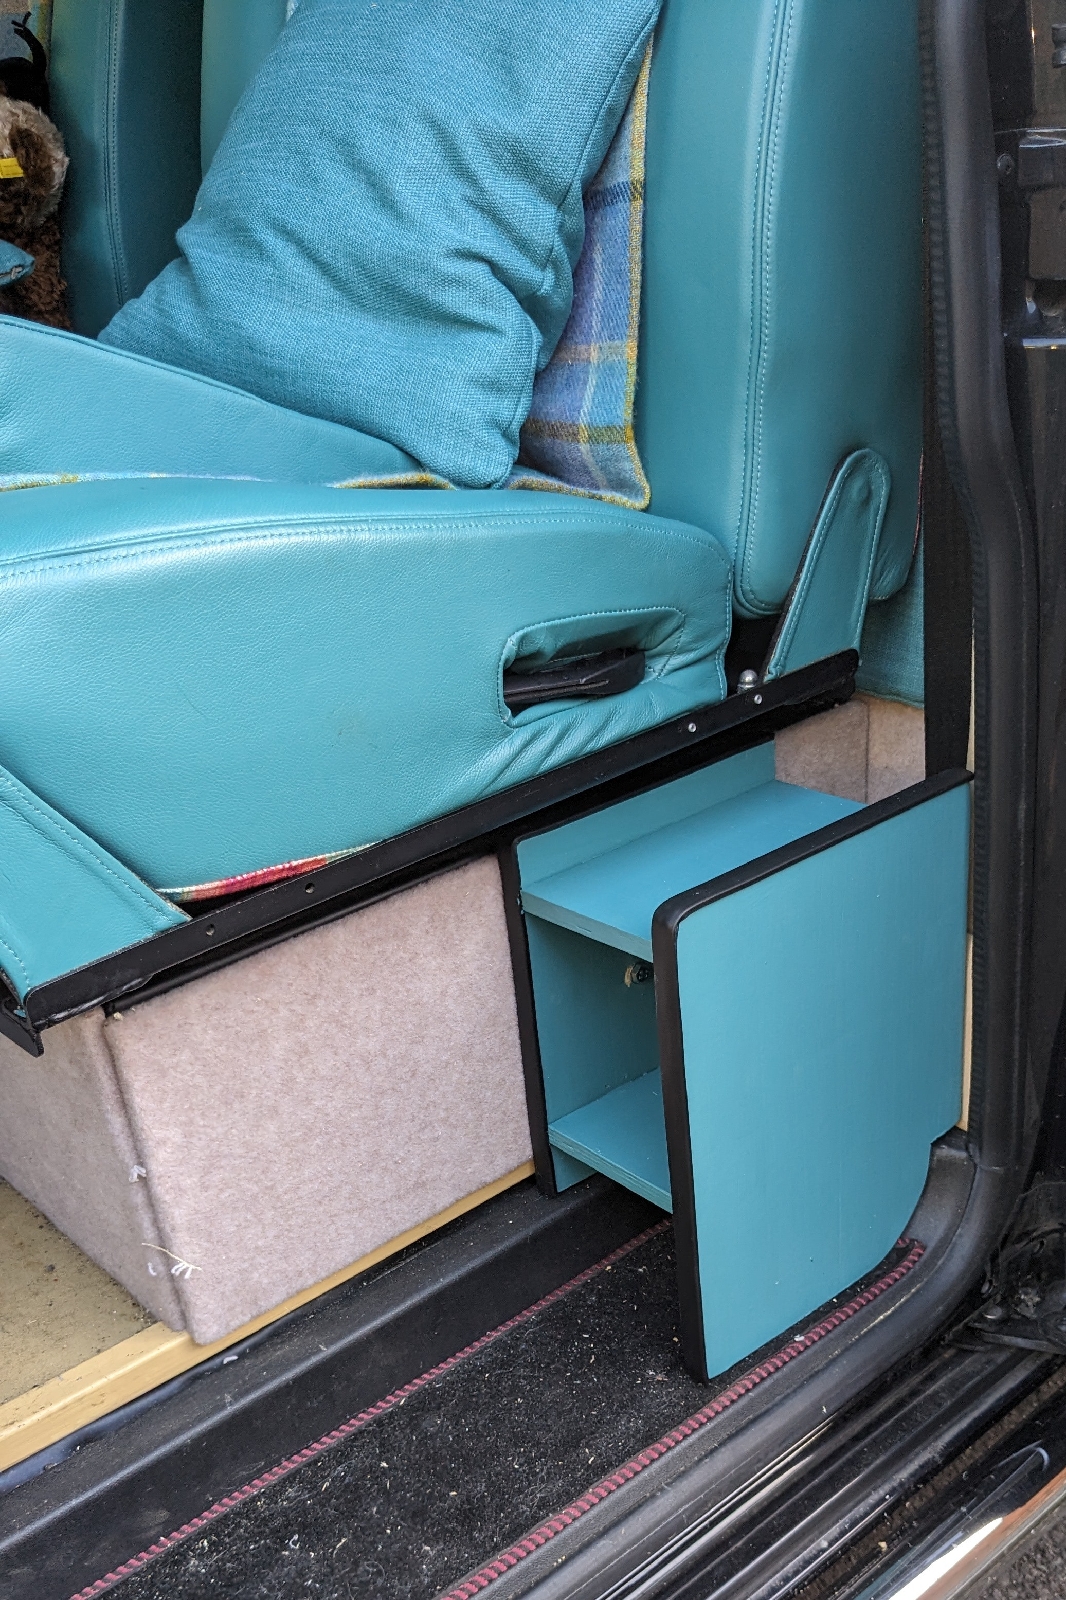
Decided to butt fit to the wheel arches and the fit end panel to tidy up. This gives us extra storage behind them. 
We've paired everything down to what we actually need. 
Kept the propex heater.
Removed the underslung LPG tank it is becoming increasingly difficult to find garages that have LPG filling points. I'm guessing it's around the increase in electric vehicles. So will use a 907 LPG bottle, refillable and still easy to source. We've never used the camper in the winter and only use the propex for 5-10 mins on a morning! 
Idea is to fit LPG hoose with a quick release system so we can switch the bottle between the portable camping double stove n grill and the propex, along with be able to cook outdoors weather permitting, best of all worlds from our point of view.
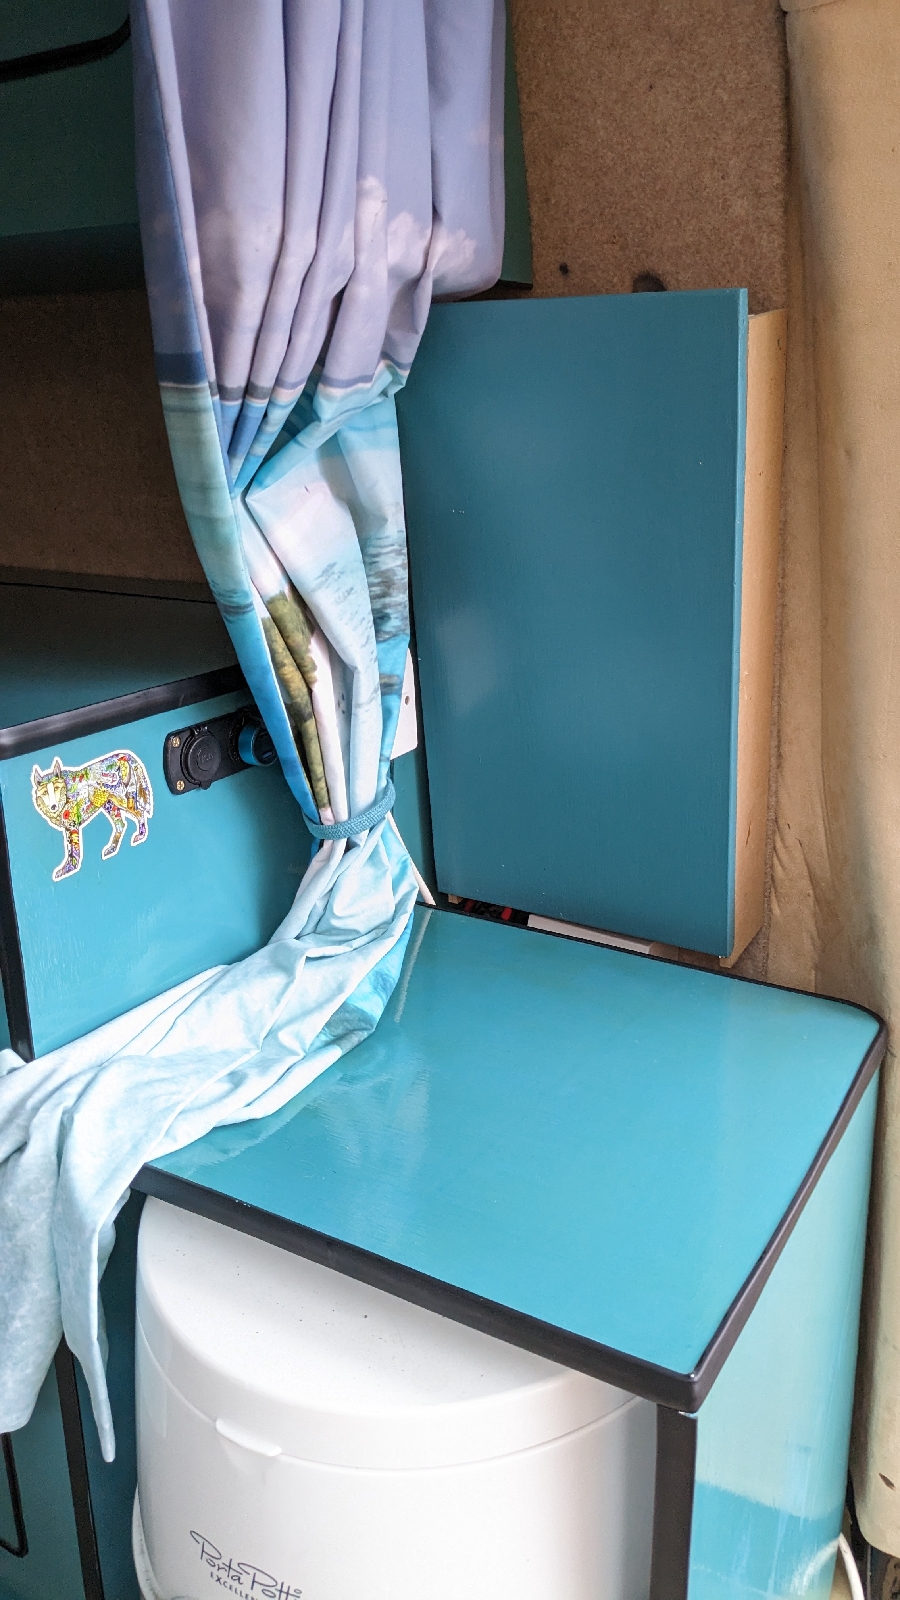
The 2 base units storage at back allows the table, table leg, portable stove to be stored behind them, with easy access. 
The wall unit will have our clothes etc in keeping high weight to a minimum. 
We also have storage under the RIB Seats. 
The freezer box is 12v/240v and have fitted a usb, cigar socket on side of floor unit to be used whilst traveling to keep stuff cool. Along with mains when in hookup. 
100 watt solar panel is wired to Victron MPPT 75/15 with main and leisure batteries wired in parallel. The T6 main battery cannot be left off charge for more than a week because of the " new tech" in engine etc. Regen brakes, smart alternator, and various computers that monitor all in sundry! 
Wiring batteries in parallel allows the Victron MPPT to charge as one. I've been experimenting with connecting and disconnecting liesure battery from main battery when traveling. No problems have been found. So both batteries are wired in series permanently.
The Victron can be adjusted/ monitored via Bluetooth app. As the smart alternator throws a lot of volts to battery on startup 15v+ I've lowered cutoff to 14v on the MPPT. 
Minor bonus is the regen braking will now help both batteries. 

Not been able to use the camper for several months both batteries are in very good condition. Whereas previously main battery having to keep all the electronics going had gone flat! As said monitored by the Victron MPPT I can monitor from the house! 

So just a few small adjustments in the van and all is ready for the road.
No thanks to the idiot suppliers of the floor units who couldn't be arsed to supply me with the missing panels! Cost them £250 in the end via chargeback! Instead of £20,! πŸ™„

Monday 29 May 2023

heading towards the finish now! 29/05/23


Just got to make top n side to cover the Porta Potti. Then put a cushion on it. It has a secure base fitted with a latch , easy to pull out still tho. 
The freezer box can be used on mains or 12v, mains cable long enough to reach 240v plug. And will need to fit 12v cigar socket for traveling etc.
Cigar socket fitted 08/06/23

Wednesday 24 May 2023

second unit saga 24/05/23

The company that I bought the units from sodded about fur months, ignored my requests for them to send me the missing 2 panels. So much so that 3 months went by. Offered me 15% to sort it myself ! Around £40 a sheet of ply over £140! As a member of the public I wasn't paying that much for 2 x 800 by 400 of a 1200 X 3000m sheet! 
Eventually I had to use Mastercards chargeback after some lengthy phone calls I got the price of one unit back £250! The company CF Woodworks Never bothered first or last! 15 messages all polite requesting missing parts failed. 
Fir the sake of sending 2 pieces of timber it cost them £250!

Sunday 19 February 2023

19/02/23

Getting there!
These units are narrower than previous. 
Left one awaiting base and top! 
So there's more space between them. We've decided to leave a gap at the back, to add storage etc. Probably the portable hobs, this decision enables us to cook inside and out. 
Adding hooks and a bag to put the hobs in will enable us to have easy access to hobs and anything else! 
And keep the Propex for any chilly nights extra .
Will add fillers to back of unit and paint accordingly, undecided re a filler at the top. 
Forgot I'd not fitted the catches to the wall unit! 
So that'll be a fiddle for another day! 

Thursday 16 February 2023

second unit πŸ₯΄πŸ˜±πŸ˜‘πŸ™„


Second unit got sent without worksurface or base or trim and the drawer side was arse about face AND one of the side panels was routed on the back not the front!
Company helped to start with but then tried to fob me off with a 25% refund, so a could source my own missing panels! Not happening! Then " it will be mid march before stock arrives" said I'll wait! I'd have to buy minimum half sheet at over £100! Then cut shape rout!!

Not impressed. 

Monday 6 February 2023

wall unit ( NS unit swapped to offside to assist mounting position. 06/02/23

Wall unit built will sit just below the top bed. Had to shorten by 4 " 2" off each side to get correct length. Not just the trauma of fitting it! As in making sure it's screwed inti the structural beams behind the carpeted panel. 
Will have to loosen it and mark with mading tape on carpeted panel!
Porta potti will be boxed in with a cushion on top ( maybe!)

Wednesday 25 January 2023

first fit 24/01/23


Paint matches the seats well! Just need to trim away some of the base to resess unit towards the window. Will fit a spacer at the back as if unit up against wall we'll loose most of the space on the bottom ! The joys of wheel arches! 
OS unit to build and ordered a 1200 wall unit. 

Sunday 22 January 2023

Nearside Unit 23/01/22


First Cabinet finished
Hassles with the plastic trim, along with company only sent me one pack of it for 2 units!
All fitted well, mostly ! But when trim fitted to doors they do not shut properly in corners! 
So had to sand out about 2mm  in a couple of corners! 
Also where the hinges are attached to wall part of the hinge sits very close to the edge of panel which then interferes with the edging again! Doors shut but the edging is raised a little. So will need to remove a small amount of the " tongue" so the the edging sits flat!.
Next up get it into van to see what needs removing around the wheel arches.

Friday 20 January 2023

First cabinet build

Went together fairly easily, instructions supplied were basically generic covering several of thier units in particular the 3 cupboard one. 
So had a few head scratching moment ! In particular by the drawer, one side of the cabinet had a wooden extension to allow drawer of runner, but no mention of left side! It wasn't till end of build that I found a random piece of ply, which had 4 punch marks for screws. Which thankfully was the width and depth needed to bridge gap for second drawer runner. 
Took a little be fettling to get it all to work but got there! 
Next up prime and paint the unit and fit that black trim around drawer and cupboards as well as the panels. At this point looks a bit tight but we'll see! 

Managed to get a couple of litres of matched Paint (to the leather of the seats ) 
It going to take a few coats, although I'd sanded the wood panels there is still grain/ imperfections showing  which is a little annoying! 

Monday 16 January 2023

16th January 2023

Building the first unit: 
Still think it's rediculous that it's cheaper to buy flatpack kit including all sundries than make your own! 
Bought 2 the same, one for cooking, one for clothing etc. Adapted to our needs if needed! 
First one finished, but no interior shelving! I've some MDF same thickness that I can make a shelf with fortunately. πŸ™„
Finish is reasonable but edges need sanding and instructions are for a larger unit so some guess work was needed. 
I followed instructions but had to move the centre partition over by an 1" to accommodate the drawer.

Giving it a undercoat of paint , as going to match units to the seat leather to brighten up the back a little. Trip to B&Q tomorrow methinks!