Sunday 29 May 2016

lets do some more


So I thought I'd have a gander at the panels at the back see what was behind them. painted as well which is a bonus I remember when if it was covered it didn't get painted ! Taking an old fashioned remedy for preventing any "booming" of large flat panel areas, I bought a pack of B&Q's cheapest stick on tiling £7.00 for a pack of 11. and stuck them onto the panels.Cheap and cheerful but do the job I have enough for both walls and the rear hatch from the doors back. I had a quick look behind the panel on the hatch, and it is made up of several channels and reinforced. So I do not think I will need to do it but I probably will just because I have the tiles!

I will be spraying Dinitrol also in those lower panels,again this helps towards eliminating boom, but also it is difficult to stop condensation completely in these vehicles. By spraying the bottom half (and any crevices I can get to this will prevent rusting. I will then be using Dacron to insulate and then wallboard ( like the ones used caravans they have a coated front cover) which will cover that to give me a clean flat area to build onto for the units.

Saturday 28 May 2016

Go swivel


Having removed the bulk head I decided to fit the passenger seat swivel.
My nearly 3 year old grandson Isaac decided I need guidance so he lay next to me issuing instructions! 
I'm using Sportcraft TUV approved swivels.
But the instructions come in German!
I found a generic video on you tube, I had a rough idea but always worth watching a video if it just give you some short cuts!

So you do not need to take the plastic surround completely off.
On the T6 it's held along the side by push fit studs. At the front of each side there is a small fixing just beside the bottom of seat. Difficult to see and a pain! It has a torx head screw, doing this by touch I get told by my daughter " why don't you use the front camera on your phone to see it?"
Doh!
Anyway I unscrewed and unscrewed seemed to be getting nowhere so I thought I'd gently prise it off, it popped out straight away! It's actually one of those mushroom panel fixings, the ones that normally have a simple pin in the middle that you push in once in place!.
The panel on the right side of the seat with the seat back rake adjuster can be left in place just remove the fixing at front gently pop out the side, you can easily get at the bolts and nuts.
Push seat forward undo rear two bolts
Push seat back remove front two nuts.
Lift seat off
Place swivel over front and back holes and turn it enough to access the four holes.
Not to easy but you need the access
Bolt the back two
Use the nuts to secure the front two.
Straighten the swivel, easy now it's bolted down!
Place the seat on and slide seat forward enough to see the bolt holes using the new allen bolts loosely fit them slide seat back and fit the front two Allen bolts.
Tighten all.
Word of warning here:
Make sure you slide the seat evenly or bolts will not align!
That's it took about an hour first time but the two fixings on the plastic caused some delay along with keeping a 3 year old occupied if he can't screw the screws!
Pop the plastic back on and play! and amaze the grandchild when you turn the seat backwards!!
I'll stick some pictures up of the drivers seat when I do it, same procedure. So I'll point out the hidden bits!
No instruction for the handbrake relocation so that might be fun!
Or do what we used to do stick foot on foot brake release the handbrake a couple of notches and swivel seat enough to re apply the handbrake.

Obviously this is how I did it, I have experience working on bodywork of jags and Rollers so if your not confident in yourself, get help!
Not my fault if you cock it up

That goes for ANY other info I offer in how to build or replace. What I am unfamiliar with I ask, read and watch videos then decide if I will do it.
Also certain things like gas fittings need to be signed off by a qualified technician!

Friday 27 May 2016

Right lets get started!


First task is to remove the full height bulkhead. So 8mm bolts all around the bulk head (which is in two parts) So a few pictures of the many bolts to be removed. they are not on tight so I went around loosening them then removed all I could of the top part of the bulkhead.


Picture below is off the top of the bulkhead from the cab, this I found out has 4 torx screws under a small strip of interior paneling  which runs the width of the van area you can just see in it in the picture below

The strip is held up by 4 plastic  ribbed "nails" which are ridged carefully free them to get at the torx screws I used  a clean flat head screwdriver worked a treat!


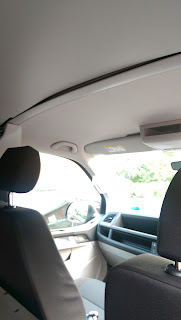
Here it is put back in after bulk head removed not pretty as the roof lining (carboard basically) is not attached in anyway. But as I am having a pop top fitted makes no difference and I shall remove it prior to the roof being fitted. The cardboard will come in useful for panel templates.


There is a small frame around the van which the bulkhead is attached to, this is welded in place some people remove it, but at this point I think once the floor is in place it might not be need removing. We'll see!

Is this my new van?


So calls made as to what is going on!

The missing stuff seemed odd to both myself and my supplier so he set off to sort.
It turns out both myself and supplier were unaware of several differences
the climate control is new type doh!
cruise control a tiny button on end of stalk Doh both myself and supplier expected a third stalk! Doh!

so we went through all the details and finally got things sorted I am waiting on a couple of things to be put right. So all things being equal van will be sorted an we can get on with the conversion!

Albeit, slowly for reasons that are complicated and not for public viewing at this point so bare with me!

Monday 23 May 2016

thursday 26th May soon to be upon me!

Couple of days before Van arrives!

We went to the Newbury show at the weekend to look at conversions etc and hopefully pick up a couple of bargains!

Fire Extinguisher
Fire Blanket
Couple of continental mains lead adapters ( we learnt long ago French mains supply on sites that the pole can be either or! so I had two adapters just switched the pole on one)
Sportscraft seat swivels x 2
Most of the LPG fittings sorted

Almost sorted the interior design and colours.

Skyline Roof fitting sorted for 01/07/2016
Roof
bed
solar panel and my windows will be fitted.
Skyline havn't been around for long it seems based at Weston Super Mare but have been patient whilst we decided on what and where and has saved us over £1.2K
So we will spend a night in WSM whilst it is sorted and drive her home on the 2nd with roof window and solar panel all sorted!

Insurance as expected was a nightmare. Companies give yo 6 months to complete basic conversion and you have to notify DVLA
Problem: To secure a decent price as in 5k saving it comes under a lease agreement sort of! Bottom line I do not get the Reg Doc for 11 mnths Soooooo!

Van insured as commercial vehicle but for private use only, no problem. Except when I queried about adding campervan equipment. price went form £245 to £589! Now a campervan fully converted is only £320 for me!
I'll leave it at that for the time being!

Friday 20 May 2016

Its on its way!

Take delivery 26/05
Oddly nervous about it now it's actually going to happen!
Insurance sorted
Seats should be here soon
Gas IT set up arrived so can refill at the pump, shock when I found out the old camping gaz 6kg bottles are now £26 ish refills! So I now have a 11,kg bottle and all the kit to plumb it in that will pay for itself very quickly as LPG is around 70p a litre at most!
Need to decide on floor when seats arrive and swivels sorted. To establish the correct height of floor I need the seats lined up with the front seats.